General Information
Don’t see your answer here? Contact info@cancred.ca
Video Tutorials
This series of short tutorials takes you through the process of creating and issuing digital badges and micro-credentials on CanCred Factory. Each tutorial embeds advice on how to maximize the benefits of the CanCred platform to meet your objectives. The full collection is contained in the playlist below; individual tutorials are also embedded in relevant sections below.
What Is CanCred Factory?
CanCred Factory is a cloud-based platform which offers associations / NGOs, educational institutions, companies and other organisations tools to create, issue and manage meaningful and sustainable Open Badge ecosystems.
Technical Requirements
To use the service, you need an internet connection and a web browser which supports HTML5 technology. CanCred Factory can be used on any device.
Concept and Roles
Environment
When an organisation becomes a user of the service, a new area of operation is created. This is called the organisation’s environment.
Open Badge
In instruction material and in the user interface “badge” is usually used to refer to an Open Badge.
Admin
An organisation’s environment is managed by a user in an admin role. The administrator of the CanCred Factory service creates the first admin user for the customer organisation.
The admin user is responsible for the settings and user management of the environment. S/he creates and deletes other users and sets roles for users of the environment: admin, creator or issuer. In addition to managing the environment, the admin user can also create and issue badges.
Creator
Creator is a user who has both Creator tools and Issuer tools at her/his disposal. S/he can create, edit and delete badges and images, criteria pages and email templates related to badges. A creator can also issue badges and follow reports.
Issuer
An issuer is a user who has access to Issuer tools. S/he can issue badges designed by creators and view reports related to issued badges.
Reviewer
A reviewer is a user who reviews badge applications. The reviewer and be a CanCred Factory user (admin, creator or issuer) or s/he can be a reviewer coming from outside the account. Peer assessment is also done by reviewers.
Recipient / Badge Earner
A recipient is a person who has earned a badge. The recipient does not have an account in the CanCred Factory but receives the badge via email. From a technical point of view, the only piece of information which the issuer needs to issue a badge is the recipient’s email address.
In addition to using the “recipient” term, also the term “badge earner” is used in instruction material and in the user interface. Basically, they mean the same thing but the term “recipient” highlights the issuer and the process of sending the badge, whereas the “badge earner” term highlights the point of view of earning the badge.
Consumer
A consumer is a person who views the badge earned and shared by the recipient. The recipient of the badge might have shared the badge in, for example, social media or via an ePortfolio. The consumer can be a friend, an acquaintance, a relative, a family member, an employer, a colleague, a partner, etc. of the badge earner.
Dashboard
The Dashboard is the user’s start view when s/he logs into the service. From the dashboard the user can see in one view what has happened lately in the service (Activity), the organisation’s badge statistics (Statistics) and organisation’s subscription status (Current Subscription).
The dashboard is visible to all users of the environment and its purpose is to support the organisation’s team work. The tools available on the dashboard aim to give the user a quick and easy review of the organisation’s badge situation and latest activity.
Activity
The Activity log displays the latest activities carried out in the environment. The log tells the user which user has done what, what kind of activity it is and when it has occurred. The activities usually relate to badges but also important operations related to maintenance and user management, like creating or deleting a user, are shown.
The aim is to give the user a clear view of what has happened since her/his last session and who has carried out these operations. Via the Activity log the user also gets an overview about the usage of the service in her/his own organisation.
Statistics
The statistics displayed on the Dashboard are general statistics relating to the service use.
The Statistics view tells the user the following things:
- Badges created: How many badges has the organisation created in the service
- Badges used in issuing: How many badges out of all created badges have been issued
- Total number of Earners: How many badge earners does the organisation have (all issuing events in total)
With the help of the statistics the user can follow the development of her/his own badge base and the number of issued badges.
News
News that have been released in CanCred Factory’s website will be shown here. You can read the whole article by clicking the Read more link (opens in a new tab).
Creator Tools
The tools with which users in the admin and creator roles can create and manage badges are found under this function. The function is not visible to users in the issuer role.
Badge Library
Badge library is a place where a creator can create new badges and edit badges s/he has created earlier (badges s/he has created her/himself or badges created by others). All badges created by the organisation are listed in the library. In the library, a user can view badges, search for badges with different search criteria and make changes to badges.
Organising badges
Badges can be organised either by modify date (Order by last modified) or by the title (Order by title) of the badge.
Searching for badges with keywords
Badge searches can be made with keywords by typing a word into the Filter field. The search is performed immediately as you type in the word.
Searching for badges by category
You can also do searches by categories defined by creators. Categories are types of keywords and badges are classified into topics with them. A creator can create new categories when needed and one badge can be added to several categories.
If categories are added to badges, the Badge library page displays all created badges and the category All is selected:

Searching for badges according to one category
Click the appropriate category, for example instructions, and as it becomes active, only the badges categorised with the word “instructions” are displayed:

Adding a category to a badge
- Click the badge to which you want to add categories.
- Add a category to the Categories field and click Enter after which you will see the category under the Categories heading. Note! If the category has already been added to another badge, the system suggests it automatically.
- Once the categories have been created, click the Close button in the end.
Removing a category from a badge
- Click the badge from which you wish to remove categories.
- Click the small cross next to the category’s name.
- Once the categories have been removed, click the Close button in the end.
Creating a new badge
Video tutorial: Create a simple test badge
A supplement for this section. Use the player controls to maximize the screen display.
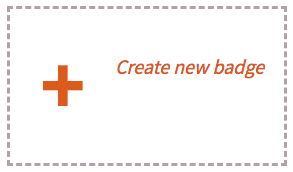
Create a new badge by clicking the empty badge icon with the text Create new badge.
A new view will open where the badge creator can fill out the badge’s information (1. Content), write an email message to badge earners (2. Message), define additional settings (3. Issuing) and ask for endorsements (4. Endorsements). Section 4. Endorsements will be visible only when the organisation has one or more partners in Network area.
1. Content
Information regarding the badge will be saved and the metadata will be “baked” to the badge with this form. The information will be shown to the badge earner and consumer.
Image
The most visible part of the badge is the image attached to it and it is uploaded either:
- From the badge creator’s computer: Upload a file (PNG or SVG) or
- Pick from library if images have already been saved there.
The picture needs to be:
- PNG or SVG
- square, we recommend 400 x 400 px
- under 250 kB in file size.
3. If there is not a ready-made image, the image can be created with the badge editor by clicking the Edit image link.
The image is compulsory and needs to be uploaded the latest when the badge is saved.
Language
Video tutorial: Create a multilingual badge
A supplement for this section. Use the player controls to maximize the screen display.
A badge can be created with one or more languages. From the Add language menu the badge creator can add a language/languages that will be shown both to the badge earner and consumer.
The language chosen first will become the default language but it is possible to change the default language later when more languages have been added.
The fields that will be filled out with additional languages are name, description and criteria if the badge is made multilingual. Please note that the badge image will remain the same in all language versions.
It is possible to examine different language versions by clicking the Preview button below the image.
NB! If the badge is created with several languages, it is good to finish with all language versions first and then issue the first badges. If languages are later added, new languages won’t be updated to those who have already received the badge.
Name
The name of the badge can be 128 characters long and it is visible for the badge earner and consumer. Choose a name that describes the badge in the best possible way. This is a compulsory field.
Description
The meaning of badge description is to describe the meaning/content shortly and effectively so that the badge earner and consumer will be interested to study the badge more. 1,000 characters can be used for the description. This is a compulsory field.
Tags
The badge issuer can determine with tags to what theme the badge is related to. NB! Tags are different than the CanCred Factory categories.
Expiry date
It’s possible to set an expiry date for the badge after which the badge is no longer valid. The badge issuer organisation can create badges that require further education or similar from the badge earner to continue the validity of the badge. The expiry date is given as month/year when creating the badge but an exact expiry date can be given when issuing the badge.
Alignments
Video tutorial: Create Alignments for a badge
A supplement for this section. Use the player controls to maximize the screen display.
It’s possible to add an alignment to the badge that will be shown as a link to the badge earner. NB! Before you can add an alignment, it needs to be added to the environment in Admin tools → Alignments. It’s possible to add an unlimited amount of alignments to the environment. 9
Criteria
One of the most important metadata fields of the Open Badge is the criteria because that is where it is determined why the badge has been created and on what basis the badge has been issued to the badge earner. It is important for organisations to really think about the criteria of the badges they issue because they set the value of the badge for the earner.
Basically the skills, accomplishments and learning of the badge earners are being described in the badge criteria. In addition to text, criteria can also contain images and links. It is possible for example to point to different sites that compliment or open in more detail the description of the criteria.
Creator can compose the criteria themselves or upload a ready-made criteria template: Pick template.
It is possible to save the composed criteria as a criteria template for later use: Save as template.
Criteria is a compulsory field. The user can save an unfinished badge as a draft but it is not possible to change the badge as ready for issuing before there is content in the criteria.
Ready for issuing
If the badge is not ready for issuing and the user wants to edit it later, the badge will be saved as a draft (Save and close). In this case, only admins and creators can see the badge in Badge library.
If the badge is completely ready and it can be issued, the Ready for issuing is chosen. After this, the issuers will also be able to see the badge: Issuer tools → Issue badge.
Advertise in Passport
It is possible to advertise badges in CanCred Passport by clicking the Advertise in Passport link. More detailed instructions regarding advertising will be given in the pop-up window that opens after clicking. Organisations will gain more visibility for their badges among badge earners by advertising them.
2. Message
The email message that will be sent to the badge earner when they are issued a badge, will be created with this form. The message consists of two parts: the body of the message and the footer. The link, through which the badge earner can accept the badge issued to them, is located between the body and footer of the message.
Title: Email subject.
Email body: This is the actual message for the badge earner that usually explains why the message receiver has been issued an Open Badge. The last sentence of the body can be for example: “You can accept the badge by clicking the link below:”
Link text: A link will be automatically added to the message and by clicking it the badge earner can download the badge. The creator of the badge can set the text that is shown in the link. If the field is left empty, a default text will be added to it: “Get your badge”.
Email footer: The issuer can add for example a link to their website in the footer of the message.
The creator can compose the email message or upload a ready-made email message template: Pick an email template. Using templates creates unity in the issuing process of the organisation and also saves time from the creator and issuer of the badge. Messages are usually very similar to each other although the badges might be very different.
The creator can save the message as a template for further use by clicking the Save as template link.
It is not compulsory to fill out the Message form and the creator can leave it empty. In this case, composing the message is the issuer’s responsibility.
3. Issuing
Instructions for issuers
In this field, the creator can save information regarding the badge that has been meant for internal use to help out creators and issuers. The creator can tell for example who are responsible for creating the content of the badge and for the graphic design, what is the use of the badge, in what connection is it possible to issue the badge, what is the connection between the badge and other badges etc.
Editing the example questions
The admin user of the environment can edit, add and delete example questions:
- Click Admin tools from the top menu
- Click Guideline from the left menu
- Remember to click Save when you have finished editing the questions
- Edited questions will be immediately updated to new badges’ Instructions for issuers field but the edits won’t affect the texts on already existing badges’ Instructions for issuers field.
Creator users can edit the example questions in the badge’s Instructions for earners* field when they create a new badge or edit an existing badge. **Instructions for earners field is optional and it doesn’t have to be filled out or edited.
Sub-organisations
If the organisation has the sub-organisation feature in use and sub-organisations have been created, it is possible to choose from the settings the sub-organisations that can issue the badge.
4. Endorsements
Video tutorial: Get a badge endorsed
A supplement for this section. Use the player controls to maximize the screen display.
Once the badge is ready for issuing, the badge creator can ask for endorsements by clicking New endorsement link, by writing an endorsement request to the Message field and by choosing the partners from the partner list that the message will be sent to. NB! The partner/partners need to be added prior to this in the Network area.
Badge editing / copying / deletion
User will see all badges created for the organisation in the first page of Badge library, whether they’re ready or drafts. The badge will be edited as follows:
- Click the badge to be edited and click edit in the menu that opens. You will be taken to a form that is familiar from creating a badge. NB! If the badge has been set as *Ready for issuing** and it has already been used for issuing, it’s not possible to make changes to the badge that has been issued. This is why it’s good to keep badges as drafts until it’s sure that the badge can be used for issuing.
- It’s also possible to copy the badge from the same menu and use it as a base for a new badge. This can be done by clicking copy. This way it’s possible to effectively benefit from texts that are ready.
- It’s also possible to delete the badge via the same menu by clicking delete.
Milestone badges
A milestone badge (or meta badge) is a “super badge” associated with a collection of “smaller” badges. A milestone badge is automatically awarded to an earner when all required badges in the pathway have been issued.
The role of a milestone badge in the badge system is determined by the issuer. It can be the final step in a pathway, it can express an access to a “higher level” or it can be a compilation or a summary badge.
Please note that required badges in the pathway can be issued in any order. This makes it possible for earners to progress in their own pace.
NB! It’s also possible to issue a milestone badge as a single badge even if the badges associated with the milestone badge have not been accomplished by the badge earner.
Creating a milestone badge
Video tutorial: Build a Milestone badge pathway
A supplement for this section. Use the player controls to maximize the screen display.
Create the milestone badge as a regular single badge first (see Creating a new badge in instructions). No information about the badges associated with the milestone badge is automatically added to the milestone badge so if you want some information to be displayed about these badges in the milestone badge as well, this information should be written for example in the criteria page of the milestone badge.
After this, click Creator tools and choose Milestone badges. Click Create new milestone badge. Choose a badge from your badge library. Then add the required badges in the pathway which need to be earned for the milestone badge. It’s possible to require specific badges to be earned to get the milestone badge (all) or a specific amount of badges from a group of badges (for example three badges out of five need to be earned in order to get the milestone badge). Save the new milestone badge in the end.
Issuing a milestone badge
When a badge related to a milestone badge is issued, earner can see all the badges required for the milestone badge on the acceptance page. The earner can easily see all badges already earned and those still needed. Once the earner has been awarded the last badge, the milestone badge is also issued automatically.
The term milestone badge is significant only to badge creators and issuers. From an earner’s point of view, a milestone badge is a normal badge, which contains information about the path the user has taken and her/his achievements.
For the earners it would be helpful to make milestone badges differ from regular badges. Creators can for example choose differently styled images or append criteria from required badges to the milestone badge.
The flexible badge implementation of CanCred Factory makes it possible to build hierarchical milestone badges using other milestones.
Badge applications
In this case, the badge earner is active and applies for the badge by filling out an application that asks for information and possible evidences. Once the badge earner has sent the application to be reviewed, the badge issuer, in this case reviewer, can accept and issue the badge or reject the application. In CanCred Factory, the creator builds the badge application in Creator tools → Badge applications area and the creator can also activate the application. The application can be activated (shown to potential earners) and it can be managed by users also in Issuer tools → Badge applications area (click on the badge application → Settings).
Creating a badge application
Video tutorial: Create a badge application form
A supplement for this section. Use the player controls to maximize the screen display.
Basically creating a badge application is that a badge application is added to an existing badge that has been defined as *Ready for issuing**. There are five steps to creating a badge application. First, a desired badge for the application is chosen from badge library as well as the application’s approval method. There are four different approval methods:
- After review = The most commonly used approval method meaning that a reviewer goes through the application and either issues the badge or rejects the application.
- Peer assessment = The badge is issued after the application has been reviewed by a group of qualified end users.
- Automatically without review = The badge is issued as soon as the application is submitted.
- Claim code = An applicant can claim the badge by entering a claim code.
NB! The approval method of the badge application can’t be changed after it has been once chosen. If another approval method is wanted for the badge, a new badge application needs to be created for it.
After the approval method is chosen, a five-step process begins:
1. Badge
You can see the badge that has been chosen for the application in Application badge section. In case the badge is wrong, you can still change it here by clicking the badge and you will see all badges available in a new window.
If instructions have been set for the badge, they are automatically copied to the Instuctions for issuers section. Instructions can be edited.
2. Form
This is the section where the application form is build. It’s possible to build the form from scratch using ready-made elements or the form can be uploaded from ready-made form templates (Pick a form template). It’s possible to write instructions for the badge earners for example on how they should use the form to the Instructions for earners section. This text will be shown at the top of the form.
To build the form from the beginning, start by clicking + Add element dropdown menu. There are seven elements to choose from:
Text input = Creates a single line text input. This can be used for example when asking the applicant’s title, employer or similar information.
Multi-line input = Creates a multi-line text input where the form creator can determine how many lines are needed. This can be used for larger open questions.
File upload = Creates automatically a button through which the applicant can upload a file from their computer. NB! The max. size of the file is 10 MB. The max. size will be visible in the form automatically so there’s no need to write it there separately.
Checkboxes = Creates checkboxes through which the applicant can choose one or more options.
Radio buttons = Creates radio buttons through which the applicant can choose one option.
Select box = Creates a select box through which the applicant can choose one option.
Static text = The form creator can write for example specified instructions to different sections of the application form with this element.
It’s possible to change the order of the form elements by clicking the green arrow up or down. The form’s appearance can be checked through the Form preview link. If the form or parts of it could also work for another badge application, it’s good to save the ready-made form as a form template (Save as template).
3. Message
It’s possible to write a message that is used for informing the badge applicant that their application has been approved and the badge will be sent to them in the Application approval message section.
NB! If an approval message has been defined for the badge when creating it, this message is automatically copied to this section. However, it’s possible to edit the message without changing the original message that has been attached to the actual badge.
This is also the place where it’s possible to write the Application rejection message. If the badge application’s reviewer decides to reject the application (Issuer tools > Badge applications), s/he will see the application rejection message. They can also edit this message before sending it.
4. Approval / Reviewers
Depending on what approval method has been chosen when the building of the form started, different things are defined in this section.
After review application
It’s set as a default for this type of application that anyone from the organisation that has a user account (admin, creator, issuer) to the organisation’s CanCred Factory account can do the review.
It’s also possible to determine users outside the organisation’s CanCred Factory account to act as reviewers by choosing Use external reviewers and writing their email addresses to the field that opens after checking the box. It’s also good to write them a message in the Notification email for reviewers section that will go out to the reviewers when a new badge application form arrives for reviewing. NB! Applications pending for review are sent from the system once a day (11:00 pm Eastern time), not right after the application form is submitted by the applicant.
Peer assessment application
In peer assessment *Required badges** are first determined that the reviewer has to have so that s/he can act as a reviewer for this particular badge application. The required badges can consist of one or more badges and it’s also possible to determine a minimum number of badges (Minimum number of badges required).
How many peer assessments are needed to approve or reject the badge application is determined in the Minimum number of reviews section. The reviews are counted as they arrive and the option first with enough votes wins.
It’s possible to add external reviewers also in peer assessment by adding their email addresses to the field in Other authorised reviewers section.
It’s good to write the reviewers a message in the Notification email for reviewers section that will go out to the reviewers when a new badge application form arrives for reviewing.
Automatically without review application
In this case, badges are issued right after the application form has arrived so there is no actual approval process. The badge application creator doesn’t therefore have to do anything in section 4. Approval.
Claim code application
A claim code is generated for the badge application with the Generate new claim code button. It’s also possible to write short instructions for the issuers to the Description for issuers field. This can be for example info on how the claim code and url are best shared to the badge applicants. This information is visible in Issuer tools → Review applications → Select badge → Details.
5. Settings
Here are the settings of the badge application. The name is by default the name of the badge picked for the application, but it can be changed. The language selection sets the language of the user interface (Finnish, English, Spanish, French, German) of the application (name and email fields and submit button).
The status of the application can be Draft, Disabled or Active. Draft means that the application is not ready and can’t be activated by an issuer. Disabled means that the application is not active at the moment and for example the url of the application is not working but for example issuers can activate the application in Issuer tools → Badge applications → Settings.
Advertise in Passport feature enables the advertisement of the application in CanCred Passport’s Badges → Apply for a badge section. (The application status has to be Active for this feature to work.)
Active from and Active to settings make it possible to set a specific time when the application is active.
If the badge application is active, it can be shown for example in a website by copying and attaching the Application URL to the website or by using the Embed code.
Redirect URL is an optional field where it’s possible to determine an address where the applicants will be redirected after submitting the application. If the field is left empty, the applicant will receive the standard CanCred Factory notification stating that the application has been sent.
Use application form as evidence is a feature that the badge application creator can use for specifying if the application is attached as an evidence to the issued badge. The information given by the applicant is also visible in the application.
Yes = The badge application and information in it is attached as evidence to the issued badge. No = The badge application and its information is not attached to the issued badge. Optional (earner preference) = The applicant can decide if the form is attached to the issued badge or not.
NB! Technically, the badge application and the information filled to it are attached as an url (from where it’s possible to look at the application) to the badge’s Evidence section. Depending on the badge repository the badge earner uses (for example CanCred Passport), the badge earner can have different options on how the evidences are actually shown. For example in CanCred Passport, the badge earner can still choose if s/he wants to show the badge application as an evidence in the badge or not, even if the application creator has determined Yes in the above mentioned options.
Hidden badge application link
Badges shared by others
The badges shared by the organisation’s Network that can be used for issuing are shown in this section. It’s possible to manage partners in the Network area. When a partner of the organisation shares a badge, it needs to be approved before it can be used for issuing.
NB! There are two types of shared badges, where the other works so that the organisation can issue the badge in their own name and in the partner’s name in the other option. More about this in the Admin help section.
Image library
Image library is a place where creators can put images. The images are being used by the creators and admins of the environment.
The aim of the image library is to support decentralised creating process of Open Badges. When all of the organisation’s badge images have been saved to the platform’s image library and not to the users’ own computers, the right versions of the images can be used by everyone right away.
Image specifications
- PNG or SVG
- square, e.g. 200 x 200 px
- 100-300 px (w. and h.) in size, we recommend 200 x 200 px images
- under 250 kB in file size.
Images can be categorised the same way as badges (see Adding a category to a badge / Removing a category from a badge). It’s also possible to organise images and make a search with the same functions as with badges. NB! The image background is best when it’s transparent so that for example embedding the badge to a website happens smoothly.
Uploading a file to image library
- Click New image -icon.
- Give the image a suitable name and write a comment to the image if needed.
- Bring the image from computer by clicking the Upload a file link.
- Click Save button in the end.
Creating an image with the editor
It’s also possible to create the badge image with the editor: Image library → New image → Edit image. It’s possible to edit the badge’s shape, icon, text and effects for example.
Criteria page templates
On the Criteria page templates page you can see all of the organisation’s criteria page templates saved in the environment which can be used when creating new badges.
The criteria page templates are useful when the organisation wants to create criteria pages which have a unified structure and style. The purpose is to make the creation of similar badges easier and faster in such cases where the criteria of the badges do not differ from each other very much and the same kind of language and design is needed for coherence.
A criteria page template can also be used although the criteria pages are different because once you have taken a template into use, it is easy to edit it and the original template remains in the environment. The use of templates saves the creator’s time.
Criteria page templates can be categorised the same way badges are categorised (see Adding a category to a badge / Removing a category from a badge). Templates can be organised and searched for the same way as badges.
Form templates
On the Form templates page you can see all of the organisation’s saved badge application forms that can be used when creating new badge applications.
The form templates are useful when the organisation wants to create badge applications that are similar in structure and style. The purpose is to make the creation of badge applications easier and faster in cases where the badge applications don’t differ a lot from each other and the same kind of language and design is needed for coherence.
Form templates can also be used although the applications would differ from one another because once the template is taken into usage, it’s easy to edit it and the original template remains in the environment. The use of form templates saves the creator’s time.
Form templates can be categorised the same way as badges (see Adding a category to a badge / Removing a category from a badge). Form templates can be organised and searched for the same way as badges.
NB! It’s also possible to create form templates beforehand with the Creator tools → Form templates → Create new form template function even if the badge is not yet ready.
Issuer tools
With Issuer tools all users of the environment (admin, creator and issuer) can issue badges and create recipient lists for issuing.
Issue a badge
Video tutorial: Issue a test badge
A supplement for this section. Use the player controls to maximize the screen display.
1. Preview badge
Here the issuer can see how the badge appears to the recipient. If the organisation has sub-organisations in use, this is when the desired sub-organisation is chosen from the dropdown menu.
2. Set badge details
Here the issuer can define when the badge is issued and when it expires, if a certain validity period needs to be defined. The issuer can view the criteria page composed by the creator by clicking the Criteria preview link at the bottom of the page.
The issuer can add text to the criteria page if needed and this text will be visible in the Criteria addendum field, under the text added by the creator. This text can be some specific piece of information, relating, for example, to the issuing event. An example: If the badge is issued in connection with a certain training, the issuer can describe in detail what was done or what kind of learning/skills was verified on the course. The Criteria addendum field is optional.
3. Select recipients
At this stage, the issuer fills in the recipient list in the Email addresses (one per line) field or loads a list by clicking **Pick a recipient list’’ button. Insert one email address per line.
4. Edit email message
Here the issuer can modify the subject of the message sent to the recipients and the message itself (Email message body). An Email message footer can also be added where the issuer can insert additional information, for example, instructions. The issuer can also edit the text regarding the link that will be shown in the message (Link text).
The message can be previewed at the bottom of the page by clicking the Email preview link.
Depending on the practices of the organisation, the creator of the badge may have added a message when creating the badge or the message field is empty and the issuer inserts the message when issuing the badge.
5. Confirm & issue
The issuer sees a summary about the badge which is being issued. For reporting purposes, s/he can insert an Event name.
NB! If it’s a test badge and the organisation doesn’t want it to show up in reports, the issuer can tick the box for Hide from reports. This way the issuing event won’t be visible in reports.
When everything is in order, the issuer clicks the Issue badge button after which the system generates the badges for the earners and sends them a message. Issuing can take place if a message has been inserted (step 4) and at least one recipient has been defined (step 3).
Organising and searching for badges
The issuer can sort badges according to the last modification time or by title, or s/he can insert a search word into the filter field. An issuer can search by existing categories. Note! An issuer cannot add/remove badge categories.
Shared badges: If the organisation has received badges from a partner that can be used for issuing (and the organisation has approved them), the badges can be searched when the Show shared badges only box is checked.
Badge applications
Video tutorial: Issue a badge via badge application
A supplement for this section. Use the player controls to maximize the screen display.
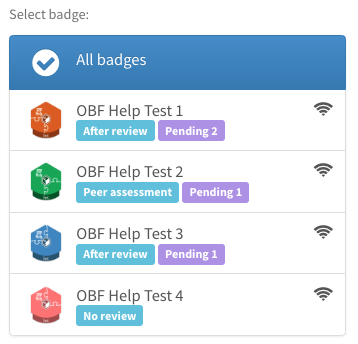
The issuer can see as a list of all those badge applications that are active or disabled and that can receive badge applications for reviewing in the Review applications section. NB! Applications where the badge is issued without review won’t be visible here.
If there are applications waiting for a review, there is a *pending** mark at the end of the badge application and a number stating how many applications have been received (for example pending 1).
The issuer can access the information regarding the badge application and start reviewing pending applications by clicking the badge application’s name.
Send me daily email notifications of pending applications With this setting, the issuer will receive an email notification regarding all new pending badge applications.
Details By clicking the Details section open, the issuer can see the url address and embed code of the application. If it’s a claim code type of an application, the claim codes are visible here as well.
Settings The issuer can activate the badge application or set the application as disabled, set an expiry date and more through the settings button.
Organising and searching for badge applications
It’s possible to organise and search for badge applications the same way as badges (see Organising and searching for badges).
It’s also possible to search for badge applications with ready-made tags. All* searches for all applications regarding the specific badge application. **In progress searches for all applications that have been started and have been saved as drafts but the applications has not been submitted for reviewing. Pending searches for applications that have been sent for reviewing but have not yet been reviewed. Approved searches for all approved badge applications and Rejected all rejected ones. Revised searches for all applications that have been sent to be filled out more completely by the applicant.
Reviewing badge applications
When a new application is received for reviewing, click first the name of the badge application after which a list of received badge applications will be shown. When the application was sent and by whom will be visible in the list (applicant’s email address).
The submitted application will open by clicking the applicant’s email address. After the information provided in the application have been read, the reviewer makes a decision if the given information was enough / correct.
Issue badge
If the information provided in the application were enough / correct, the badge can be issued by clicking the Issue badge button. Before issuing the badge, the issuer can set an expiry date for the badge and add something to the criteria page if needed. The issuer can also edit the message that will be sent along with the badge to the earner.
Reject application
If the information wasn’t enough / correct, the application can be rejected by clicking the Reject application button. Before sending the rejection, the issuer can edit the message that goes out to the applicant. It’s for example possible to determine why the application was rejected in the message.
Delete application
In case the applicant has sent the same application several times by mistake, the badge application reviewer can delete the unnecessary applications by clicking the Delete application button. In this case, the badge application won’t for example show in the organisation’s application reports as a rejected application. NB! The badge application reviewer must be careful when deleting applications and be sure, that the application has been sent in fact as a mistake. It’s not possible to return the application after it’s been deleted.
Return for revision
If there were some information missing in the application but otherwise the application could be approved, the application can be returned for the applicant by clicking the Return for revision link. A message form is opened by clicking the link where it’s possible for the issuer to describe what additional information is needed from the applicant. The applicant will receive a link to their email from here s/he can add more information to the application. NB! The information provided by the applicant before will remain in the application.
Reviewing badge application at the Pro service level
A badge application list has been created for managing badge application at the Pro service level. It makes it possible to see with one look what badge application has received pending applications. It’s possible to access badge reviewing straight from the list and applications can be ordered by Newest, Oldest or by Applicant name.
Email message templates
The issuing is done via email. The message sent to the recipients of the badge does usually not reveal the details of the badge but only generally describes the Open Badge concept, tells who the badge is issued by and how to accept it. This is why a good message template is very useful to creators and issuers because they do not have to write new instructions every time they want to issue a badge.
With the Create new email template function the issuer can create message templates for future issuing events and its purpose is to make the work of creators and issuers faster and easier.
Organising and searching for message templates
The issuer can organise templates according to the last modification time or by title, or s/he can insert a search word into the filter field. Issuer can search by existing categories.
Adding a category to message templates
Issuer can add categories to message templates by opening the template by clicking it and adding a category/categories.
Recipient lists
Badge issuers can create ready-made recipient lists of badge earners which makes the issuing of badges faster. Creating a recipient list is a good idea for example when the badge is issued after participating to an event, course or similar.
Creating a recipient list
The recipient list is created by clicking the Create new recipient list function and by writing the recipients’ email addresses one per line. The name of the list can be for example the name and date of the course or event, team’s name or something similar.
Using a recipient list
The list can be taken into usage by clicking the Pick a recipient list button when issuing the badge. If the list contains people that shouldn’t be earning the badge, those addresses can be deleted from the list before issuing the badge.
CanCred Passport
CanCred Passport is CanCred Factory’s sister service and for this reason the receiving of badge between these two platforms has been done as simple as possible. If the organisation issues the badge via CanCred Factory and the badge earner is using CanCred Passport, the badge earner can receive the badge straight to their Passport account if the same email address that the badge is issued to is saved to their account information in Passport. To make the receiving of the badge easy it’s good to:
- Instruct your badge earners to create a free account to CanCred Passport as soon as possible, even before issuing the very first badge.
- Ask the badge earners to add all email addresses they are using to their CanCred Passport account when it doesn’t matter to what address the badge is issued to as it will always find its way to the earner’s Passport account.
Benefits:
- Badge earners will receive the issued badge straight to their CanCred Passport account where they can approve or reject the badge.
- No complicated approval process through email.
- The badge is received by the earner although the badge issuing message would have gone to the earner’s junk folder.
Reports
The purpose of the CanCred Factory reports is to give the user of the environment a general picture of their organisation’s activity and information regarding how the issued badges have been received and how they have been rated.
General
General reports
- The number of created badges
- The number of badges used in issuing
- Issuing events, meaning how many times has the issuing process been carried out
- Total number of earners
Receiving badges
The graph displays reports on receiving badges. The reports show you how all badges have been received:
- Not received: No evidence the recipient has done anything with the badge
- Accepted: Badge was opened or downloaded at least once (Factory displayer, share page, Passport etc.)
Average Rating
The system gathers information on how recipients of badges have rated them. By rating badges, the recipients show how useful they find the badges issued to them. The recipient of the badge can rate the badge during the acceptance process of the badge. The scale used in rating is 1-5 (min. 1, max. 5). The report shows the average of all given ratings.
Criteria Page Hits
This report tells you how many times have the criteria pages of badges been viewed in total.
Top-10
- Top Issued: Lists the badges that have been issued most in the environment
- Top Accepted Lists the badges that have been accepted the most
- Top Rated: Lists the badges that have been rated highest among recipients
- Top Seen: Lists the badges whose criteria pages have been viewed the most
Badges
CanCred Factory provides reports on single badges where all general reports’ information is shown (see above).
Badges report’s front page has all issued badges listed and it’s possible to see with one look how badges have been accepted.
It’s also possible to organise and search for badges with different search functions and categories, if those have been determined.
Reports on individual badges
You can also view badge specific reports by clicking the name of the badge in the Badges front page.
In badge specific report site it’s possible to take a closer look at general reports related to the badge (issuing events, amount of recipients etc.)
It’s also possible to access issuing event specific reports from the same page. If the badge is used in badge applications, those reports will also be visible here.
Issuing events
Reports related to issuing events mean those reports when the badge is issued with the Issuer tools → Issue badge function. By clicking the name of the issuing event in the list (that the issuer can define when issuing the badge), it’s possible to take a closer look at the reports related to that specific issuing event.
- Under the Not received title can be found those email addresses that have not yet accepted the badge.
- Under the Accepted title can be found those email addresses whose holders have accepted the badge and taken it for example to CanCred Passport.
- Through the Send reminder message button it’s possible to send a message about receiving the badge to all those who are on the Not received list.
- With the Delete this report function it’s possible to delete that specific issuing event from reports. This function can be used for example when a badge used for testing is taken to reports by mistake.
Badge applications
If a badge application has been attached to the badge, information regarding how many earners have received the badge via badge application will show under the Badge Applications title. If for example two different applications have been created for the same badge (for example regular review and peer assessment applications), both application types have their own report. Its possible to look at the badge’s information in more detail by clicking the name of the badge. The first thing shown in the report is when the badge has been issued the first time, how many applications there are and how many badge earners. The graphic will tell the amount of approved, rejected and pending applications. General information on how many badges have been approved is also shown and more detailed information about the recipients / non-recipients can be accessed separately.
Through the Show applications (at the top of the report page) link it’s possible to look at single badge applications.
Recipients
Badge specific recipient lists can also be accessed through reports. Choose from the Recipients page Filter by badge dropdown menu the badge whose recipients you’d like to list. After choosing the badge, the recipients will appear to the bottom of the page. NB! You can choose multiple badges from the dropdown menu when recipients of all chosen badges will appear in the list.
It’s also possible to search for recipients by limiting the issuing event or by searching for badges with the recipient’s email address.
Badge Applications
It’s possible to check out reports for badges issued with a badge applications and badge specific reports.
Shared Badges
If the organisation has added partners in the Network section and shared badges for partners to issue, it’s possible to see how those shared badges have been issued in the Shared Badges page. The reports will tell for example how many times the shared badges have been used, the amount of partners etc.
Report Builder
This tool is available from Pro service level and up. The organisation can get data to be exported to Excel as CSV files with the report builder tool. The composer of the report can choose the badge / badges, time from where the data is taken from and also the recipients email addresses if data about badges issued to a specific email address is needed.
The Status field indicates whether the badge has been accepted or not:
- Accepted: Badge was opened or downloaded at least once (Factory displayer, share page, Passport etc.)
- Accepted+PDF: PDF badge was downloaded
- Seen: Link in email was clicked, no further action
- Revoked: The issuer has revoked the badge
- Unknown: No evidence the recipient has done anything with the badge
Network
In this section, it’s possible to choose other CanCred Factory organisations as partners to your organisation’s network. After choosing the partners, it’s possible to share badges with them. Note that other organisation can add your organisation as their partner if you’ve enabled that in Organisation details (Searchable). If you want to avoid this and not be shown to other CanCred Factory user organisations, remove the option (it’s on as default).
Partner network
Organisation can add partners in the Network section (other organisations using CanCred Factory) to their network. Organisation can endorse their partners and/or ask them for endorsement. Organisation can also endorse partners’ badges or ask partners to endorse their own badges after partners have been added. In addition, partners can share badges (requires min. Premium service level from the organisation sharing the badge) and receive shared badges (Min. Basic service level for receiving shared badges.
It’s possible to order a notification email about new endorsement requests by clicking the Send me email notifications of new endorsement requests.
If there are partners from several different countries, it’s possible to search for partners by country from the All countries menu.
It’s possible to filter partners with ready-made tags. All searches all partners added to the organisation’s network. We endorse them searches for all those partners that the organisation has endorsed. They endorse us searches for all those partners that have endorsed the organisation. Mutual endorsement searches for all those partners that have endorsed the organisation and have been endorsed by the organisation.
Adding a partner to the network
A new partner can be added to the network by clicking the Add new partner function. Pick a resource window opens and it gives a list of all those CanCred Factory using organisations that have enabled to be searched for in Organisation details (Admin tools). Click the name of the partner in the list and confirm the selection. The partner is visible in the Partner network page immediately.
Endorsing a partner
It’s possible to endorse a partner by clicking the name of the partner in the Partner network page. After this, click the Endorse this partner link when you can write the actual endorsement to the Compose your endorsement field. A few ready-made endorsement options are shown on top of the field (click the text and it moves to the field) that can be used as a template when writing the actual endorsement. When the text is ready, click Endorse partner button. If the organisation has made endorsement templates (Network → Endorsement templates), the template can be used through the Pick template link.
Requesting an endorsement from a partner
Video tutorial: Get endorsed as an organisation
A supplement for this section. Use the player controls to maximize the screen display.
It’s possible to ask a partner to endorse your organisation by clicking the name of the partner in the Partner network page and then Request endorsement from this partner link. Write a message to the partner where you ask for endorsement. It’s good to write what you want the partner to endorse and why. Once the message is ready, send the request.
Examination and deletion of the endorsement
Once a partner has endorsed your organisation and/or you have endorsed the partner, it’s possible to examine the texts by clicking the partner’s name in the Partner network page. If for some reason you want to delete the endorsement, it can be done by clicking Remove link on the right top corner of the endorsement.
Badge endorsements
All badge endorsement requests are listed on this page that the partners of the organisation have asked for their badges. It’s possible to order an email notification of badge endorsement requests by checking the box at Send me email notifications of new endorsement requests.. It’s possible to organise requests both with modification date and by title.
It’s also possible to organise endorsement requests with ready-made tags. All searches for all requested badge endorsements from the organisation. Pending request searches for all those endorsement requests that have not yet been processed. Endorsed searches for all finalised endorsements.
Processing an endorsement request
After the organisation has requested for an endorsement for their badge, the request will appear in the Badge endorsements list. There’s a tag at the end of the badge stating Pending request. The endorsement request can be accessed by clicking the name of the badge.
The person taking care of the endorsement request sees first the actual badge (by clicking the badge they can take a look at the badge as a whole) and under it the endorsement message written by the partner. The service provides a few ready-made endorsement sentences that can be used as a template for the endorsement. The endorsement itself is written to the Compose your endorsement field and once the text is ready, click Save. NB! If the organisation has endorsement templates saved, they can be accessed by clicking the Pick template link.
Examination and deletion of the endorsement request
It’s possible to examine the badge endorsement request by clicking the badge in the Badge endorsement list. The user can for example examine the given endorsement and edit it if needed (NB! The endorsement is updated only for new badge earners). The endorsement can also be deleted from the Delete endorsement link (the endorsement won’t be deleted from badges where the endorsement has been active when the badge was issued).
Endorsement templates
All of the organisation’s endorsement templates are listed on the Endorsement templates page and can be used when new endorsements are given. A new endorsement template can be created by clicking Create new endorsement template.
Endorsement templates are useful when the organisation wants to follow similar style and policies.
Admin tools
Accessing this section requires that the user is in an admin role. The user who creates an environment in CanCred Factory for their organisation will automatically become the first admin of the environment.
User accounts
This is the place where the admin will create and manage user accounts. There are two ways to create a user account: 1) you will send an invitation to the person via email or 2) you will manually create the user account for the person.
If you send an invitation to a new user, choose first their role (issuer, creator or admin). After this, write their email address to the Recipient email field and click Send invitation button.
If you create the user account manually, the following information is required: user’s email address, name, password and role. Roles have been described before in the Concept and Roles section at the beginning of this manual. Once the user account has been created, inform the user about it for example via email.
Organisation details
Here is the form where the admin fills in information about their organisation. The name, URL and organisation email are compulsory because they are baked in the badge metadata. The reply-to address will be used, when badges are sent by email to earners, as it is useful to earners who wish to reply to the issuer’s message.
- Searchable = If this is chosen, the organisation’s name is shown in searches and other organisations can add the organisation to their partner network (see Network).
- Show icon in badges = If this is chosen, the organisation’s icon is added to issued badges.
- Show description in badges = If this is chosen, the organisation’s description is added to issued badges.
- Upload icon = It’s possible to upload the organisation’s logo/icon and it can be shown in organisation’s badges (see option above). The image has to be square, PNG or SVG and recommended size is 200 x 200 px.
Badge languages
It’s possible to create multilingual badges and the platform shows EU area’s languages by default in the language menu when creating a badge. However, the admin user of the environment can edit this language list by adding and deleting languages from the list here.
It’s possible to add a language to the list from the Add language dropdown menu. A language can be deleted by clicking the trash bin icon. NB! Adding a language and deleting one happens right away without a separate approval option. It’s also good to note that if a language is deleted from the list, the language is also deleted from badges where the language in question has possibly been added already. Use consideration when making deletions.
Sub-organisations
If your organisation is authorised (optional feature in the Premium and Pro service levels) to create sub-organisations, this is the place where you can create them. The sub-organisation feature allows big organisations to issue badges with different issuer information. For example for a university, sub-organisations can be used so that its faculties can issue badges in their own name even if they all use one common CanCred Factory environment.
Creating a new sub-organisation is simple. After clicking the Create new sub-organisation button, fill in the form the required information: name, URL and organisation email. Other fields are optional.
After setting up sub-organisations CanCred Factory issuers will have the possibility to choose one of them when issuing a badge (Issue badge → All issuing organisation). These issuing events by sub-organisations will show separately in the Issuing events list in Reports.
NB! Once the sub-organisation(s) is created, the badge creator will have to define badge by badge what sub-organisations can issue the badge. This happens in the Creator tools → Badge library → Click on the badge and click Edit → Issuing → Sub-organisations.
Shared badges
Here the organisation’s admin(s) can select the badges that the organisation wants to share with all or some of its partners. Badges can be shared as links (the name of the original creator of the badge will be displayed in the badge issued by a partner) or as copies. When a partner is allowed to make a copy of one of your organisation’s badges, the copy will not contain the name of the original creator.
Notice that the organisation that is the creator of the badge, can manage the badges it shared as links by setting expiration dates, but it will not have control on badges shared as copies.
Guideline
Here the admin(s) can write guideline instructions for badge creators. This guideline document usually contains strategic questions that badge creator team has to acknowledge when designing a new badge. These questions can be for example:
- “Who is responsible for developing this badge?”
- “What resources are needed to develop the badge?”
- “Who is responsible of the graphic design?”
- “What are the target groups that could be rewarded with this badge?”
- “Does this badge point to competency framework? Which one?”
- “How this badge will be issued? As a part of a milestone badge? As a badge application?”
- etc…
NB! The texts in the guideline won’t be visible in the actual badge. The aim of the questions is to direct badge creators and issuers to the right direction.
Alignments
It’s possible to add for example a competency framework as metadata to a badge that the criteria of the badge point to. The alignment will be added as a link to the badge. The organisation can add different kinds of alignments to their CanCred Factory environment without limitations by clicking the Create new alignment. The alignment is given a name (will be shown as a the link’s name in the badge) and an URL through which a more specific description regarding the alignment can be found from. NB! Make sure that the alignment’s link points to a website that is as stable as possible so that the link won’t break in issued badges later on.
Deletion requests
Because of the EU’s General Data Protection Law, organisations using CanCred Factory can receive badge earners’ data deletion requests. The organisation can manage these requests in this page. Please note that your organisation is obliged to handle these requests in a reasonable time as mentioned in the Data processing agreement.
API key
The API key is requested to activate some of the CanCred Factory plugins, for example Moodle, TotaraLMS and Mahara CanCred Factory issuer plugins. Click on the Generate certificate signing request token link to display the key and copy it. For more information see plugins’ instructions.
Branding
Here you can add a banner image to your environment that can be added to a) badge applications b) criteria pages c) email messages d) badge download page. The banner image needs to be a PNG image, width 1000 px and size max. 250kB.
Subscription
In here, the organisation can manage their subscription.
-
Extend your subscription = Here it’s possible to renew the organisation’s subscription. After giving a VAT id number and invoicing email you are taken to an online store where the actual ordering happens.
-
Change sub-organisation limit = Here it’s possible to change the sub-organisation limit. It’s possible to choose between 1-15 sub-organisations. If there is a need for more, please contact our customer service. NB! If sub-organisations are already in use in your organisation, the limit can be changed in the Extend your subscription button and this link won’t be visible.
Three different ways to issue badges
With CanCred Factory you have three main ways to issue badges:
1. Manual issuing
The badge issuer sends a badge to one or several earners.
This is the traditional way to issue a badge. After some achievement of your students, partners, employees, colleagues etc. you decide to award them a badge. You collect earners’ email addresses, click on the badge you wish to issue (Issuer tools → Issue badge), fill the email list in the select recipients text box and issue the badge.
A variation of this manual way to push badges to earners can be automatic when you have installed the CanCred Factory issuer plugin in an LMS system. For example with the Moodle CanCred Factory plugin a preselected badge can be automatically issued when a student completes a course or a program in TotaraLMS.
When you decide to push badges to your earners remember to tell them what is an Open Badge and why they are getting it. This way it’s more likely that badges are accepted by earners and it’s more beneficial for the earner.→
2. Applying for a badge
In this case the earner is proactive and requests the badge by filling in evidences in a badge application. After assessing the application submitted by the earner the issuer, who is in this case a reviewer, can accept and issue or reject the application. In CanCred Factory a badge application is build by a creator in the Creator tools → Badge applications → Create new badge application section, but it can be activated (displayed to potential earners) and managed by users in the Issuer tools > Review application section.
3. Milestone badges
The third way to issue badges in CanCred Factory is by using the milestone badge feature in the Creator tools menu. A milestone badge is a chain of badges setting a pathway for the earners. The idea is that the milestone badge is issued automatically when the “smaller” badges required have been earned by the earner. You can find more detailed instructions on creating milestone badges from this help document (Creator tools → Milestone badges).
Badge sharing features in CanCred Factory
It is possible for an organisation to create and share badges with other CanCred Factory user organisations. For example an association can create badges that are useful to several other partner associations in its network and allow them to issue them in their own name. When a shared badge is issued by other organisations, the information about the original creator is added to the badge metadata.
In the Open Badge Passport this information will be displayed in an additional Created by field. This is an CanCred Factory feature, but it is built on a community extension of the OBI standard and can be adopted by other badge issuing and displayer platforms in the future.
How does it work in practice?
Video tutorial: Share badges with partners
A supplement for this section. Use the player controls to maximize the screen display.
Sharing badges with other organisations is a Premium and Pro service level feature.
If you want that your organisation can be picked as a partner by others, your environment administrator needs to check that in Admin tools → Organisation details your organisation is set as Searchable (default setting). Notice that this Searchable feature is allowed to Pro, Premium and Basic customers.
If you want to share badges with some of your partners using CanCred Factory, your administrator should select organisations in the Network → Partner network section.
The badges that you want to share with your partner network must be set in the Admin tools → Shared by us section. For each badge you can define the partners who will be able to receive it as a link or copy.
If some partner shares a badge to you, you have to accept the badge to be able to issue it. This takes place in Creator tools → Shared badges. In the pending list are the badges that are waiting for your acceptation. In the accepted list are the badges that have been accepted and can be issued by you. In the decline list are the badges that you don’t want to issue.
The badges chosen by your creator users in the Shared badges section will appear in the Issuer tools → Issue badge section. Notice that if a badge is shared as a link, it can be only issued but not edited. If it is shared as a copy, it can be modified by creator users in the Badge Library section like one of your own badges.
A badge shared as a link can be set to expire after some time or it can be unshared by its owner. In this case the badge will disappear from Shared badges and Issue badge sections, but this will not affect the badges already issued to earners.